A solution for the Astrolabacus
| "When the Astrolabacus is first pulled out of the package, all of the 36 insidious little balls are positioned in their own colored tunnel sections. Take a VERY CLOSE LOOK AT THIS, for it may be the last time you'll EVER see Astrolabacus so proudly displayed. This puzzle is deliciously deceitful in nature and simply CANNOT WAIT to be scrambled. It then begins to taunt you... to challenge you. At times it appears to even be laughing at you!" |
(Quote from the notes written on the puzzle's box)
  |
(click on any any of the two images above to enlarge)
(The above picture was taken from the - now offline - www.astrolabacus.com
site)
First of all, I would like to express my amazement for this puzzle. It is
definitely
one of the best puzzles I have ever held in my hands (actually... maybe the
best?).
It is so unusual, with such a smooth mobius-like movement that only a genius
could have thought of.
In other words, this puzzle looks like it came from another star system of this universe...! :-P
Its difficulty does not depend on the number of different combinations (although
it is quite high),
but it heavily depends on its structure and the extemely exotic way it moves.
I just wish that puzzles similar to this can follow up in the future and it
is so unfortunate
that the official website www.astrolabacus.com is not in business any more...
________ THE SOLUTION ________
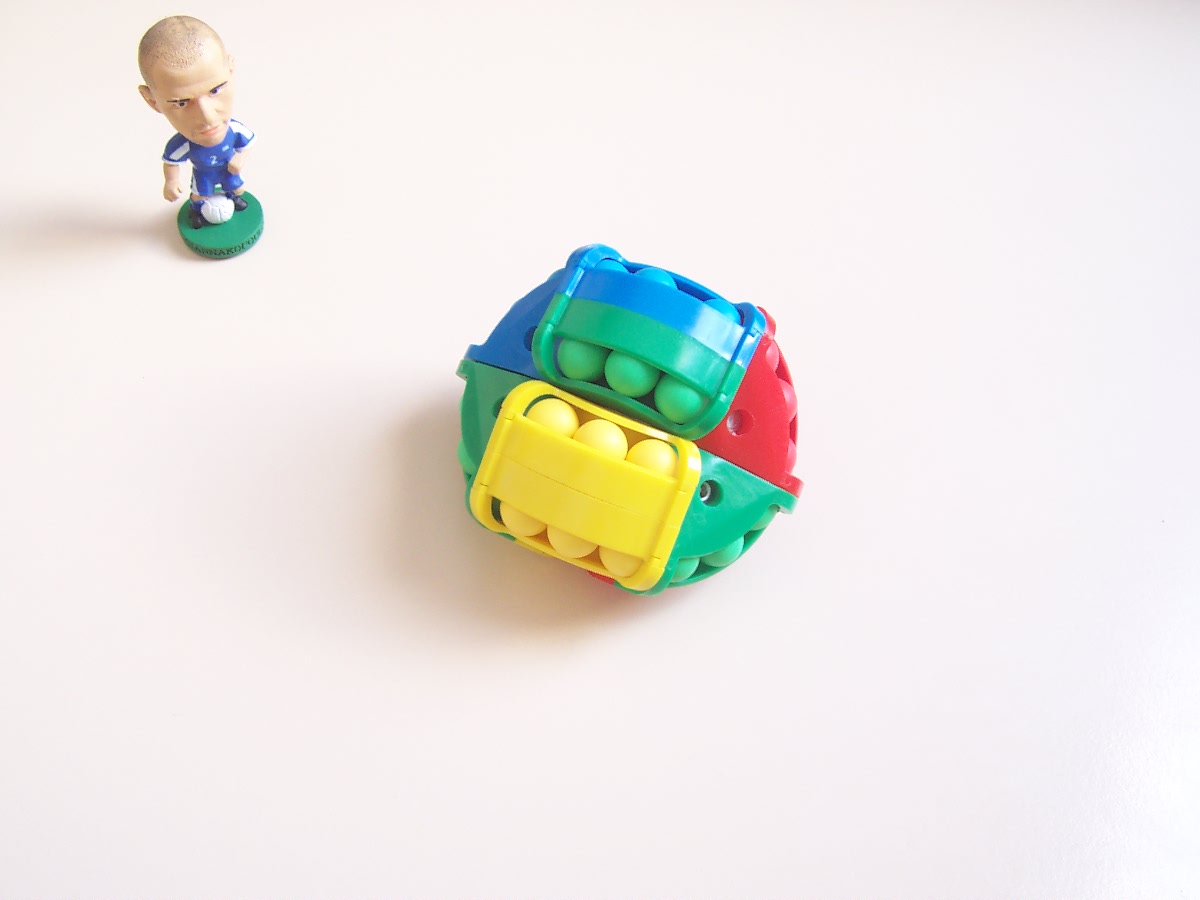
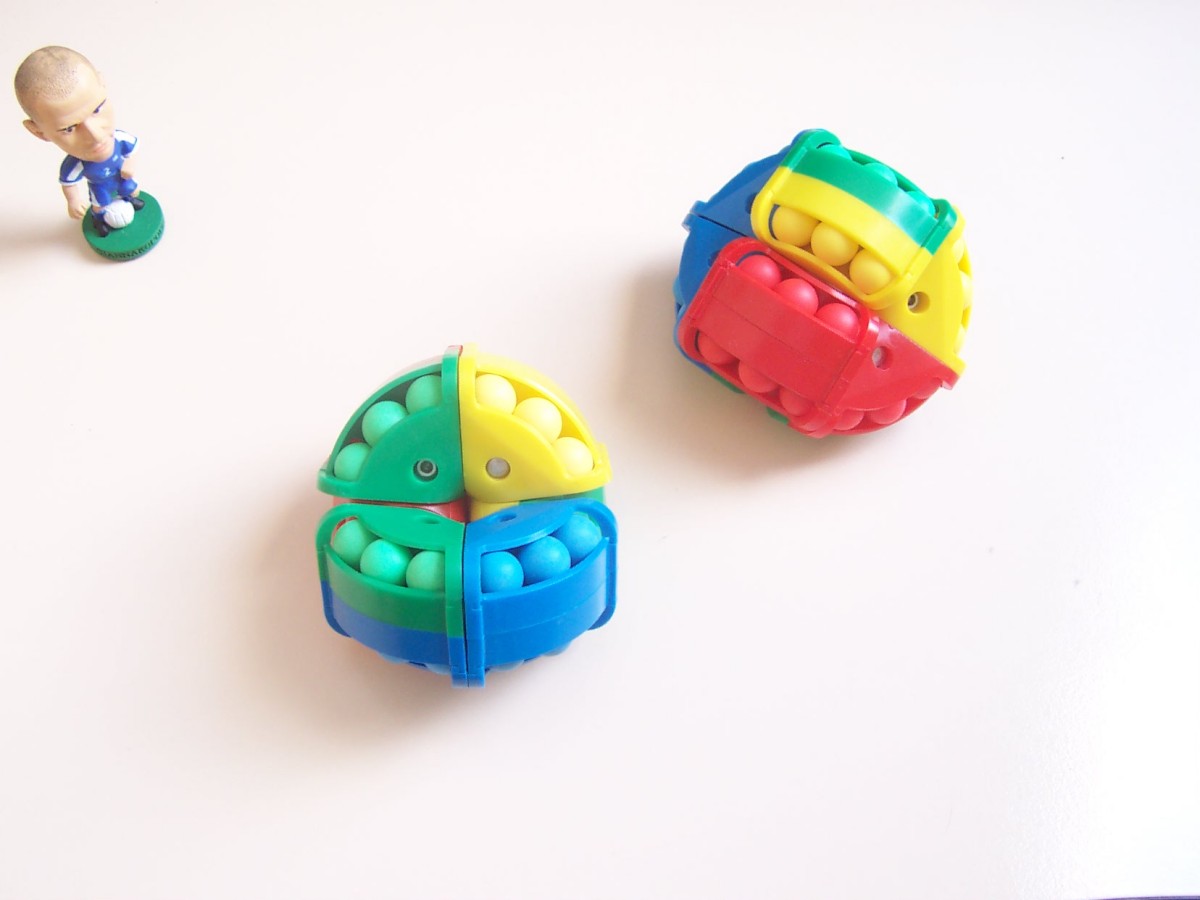
An Astrolabacus is made of six segments of various colours, and each segment has two tunnels.
The images below show that the astrolabacus has six states/generators, each
of order 18.
I have even placed some small color zones on the edges and other details to make the images look more familiar.
The way the states are named is based on the middle segments that have two
tunnels of the same color.
The numbering (1 or 2) of the states is based on the neigbourhood pins to
that middle segment (single or double pin).
|
Definition 1:
|
A shift (S)
is defined as a clockwise shift of the balls by one position.
The notation -S, refers to an anticlockwise shift. |
|
Definition 2:
|
A twist (T)
is defined as "pushing" the up-right segment until we reach
the next state.
In other words a twist is defined as moving from state B1 to R1, or from R1 to Y1, or from Y1 to B1. When the puzzle is flipped, a twist is defined as moving from state B2 to Y2, Y2 to R2, or R2 to B2. The notation -T, refers to "pulling" (instead of pushing) the up-right segment. |
|
Definition 3:
|
A flip (F)
is defined as moving from a state X1 to a state X2, or from state X2
to X1.
X is either B (blue), R (red), or Y (yellow) and represents the reference color from which we had originally started a sequence. For example, if we started from state B2, then applied some twists and shifts, a flip is turning the puzzle to the B1 position. |
The twist connects the states B1, R1, Y1 in a cyclic way:
B1 --> R1 --> Y1 -->B1.
Similarly, when the puzzle is flipped, the twist connects B2, Y2, R2 in a
cyclic way: B2 --> Y2 --> R2 -->B2.
By twisting the puzzle three times, we will end up to the same state we started
from.
The orientation regarding flips, twists and shifts, DOES NOT MATTER, i.e.
if you hold the puzzle upside down
the flip, twist, or shift will have exactly the same effect.
The Three Main Moves, M1, M2, and M3:
The moves M1, M2, and M3 (described below in term of flips F, twists T, and shifts S) are enough to solve the puzzle.
The way they are expressed is very flexible and may be used while being at ANY of the six states.
It shows which balls maybe swapped. While swapping, some swapped balls may
be of the same color.
Therefore, we should always try to observe the moves that are needed to obtain
the correct tunnel colors.
Before applying them, make sure you remember the current state.
The three lines below is all the sequences you need to remember...!
|
M1:
|
S
|
-T
|
S
|
T
|
-S
|
-T
|
-S
|
|||||
|
M2:
|
F
|
-T
|
S
|
F
|
-T
|
-S
|
F
|
-T
|
-S
|
F
|
-T
|
S
|
|
M3:
|
-T
|
S
|
T
|
-S
|
-T
|
-S
|
T
|
S
|
All "moves" were chosen in such a way, so that all changes appear
in front of the puzzle, for easier use.
In fact, the move M3 is a derivative of M1, but it is presented in a way to
"preserve" the centre balls.
HOW TO USE M1, M2, AND M3
Assume you have ended up with a scrambled Astrolabacus. DON'T PANIC!
(The universe will be safe soon again, as long as you follow the instructions).
|
1.
|
Make sure each colored tunnel has as
many matching (regarding color) marbles as possible.
|
|
2.
|
By using M1 and M2, ensure that each
centre ball has the same color with the corresponding tunnel.
|
|
3.
|
Use all moves M1, M2, M3 when needed,
to swap corner balls and solve the puzzle.
|
|
|
Like mentioned, those moves are enough to solve the puzzle, but in addition
to them I have a few more things to points out:
|
1.
|
ALWAYS keep track of the state you start with before initiating one of M1, M2, or M3. Otherwise you may accidentally scramble it and will have to have to restart from zero. |
|
2.
|
It can be useful to shift a state by a mutliple of three, and then apply M1, M2, or M3. Combinations always increase the solving speed. |
|
3.
|
Whenever it is not very clear how to improve the triplets, it is not a bad idea to swap balls, MAKING SURE, you do not destroy the position of any centre ball. |
|
4.
|
In some very rare cases, you may observe that a single shift can increase the number of triplets with balls of the same color (always being careful that the color of the centre balls remains the same). |
|
5.
|
If you end up with only two antisymmetric balls out
of position, shift by one preserving as many triplets as possible. By
applying again M1 and M2, the puzzle will be solved very fast.
|
All the tips, as well as all using M1, M2, and M3, require practice, practice
and more practice! ;-)
Finally, I present a graph overview of how the tunnels are connected with
each other.
Each state is denoted by lines of the same color.
YY = Yellow-Yellow Tunnel, GY = Green-Yellow Tunnel, BB = Blue-Blue Tunnel,
GB = Green-Blue Tunnel, RR = Red-Red Tunnel, GR = Green-Red Tunnel.
The numbers 1 and 2, indicate if the tunnel contains a single or double pin.
Please let me know of any comments or suggestions. Thanks! :-)